3 Mistakes to Avoid Building a DIY Squat Rack
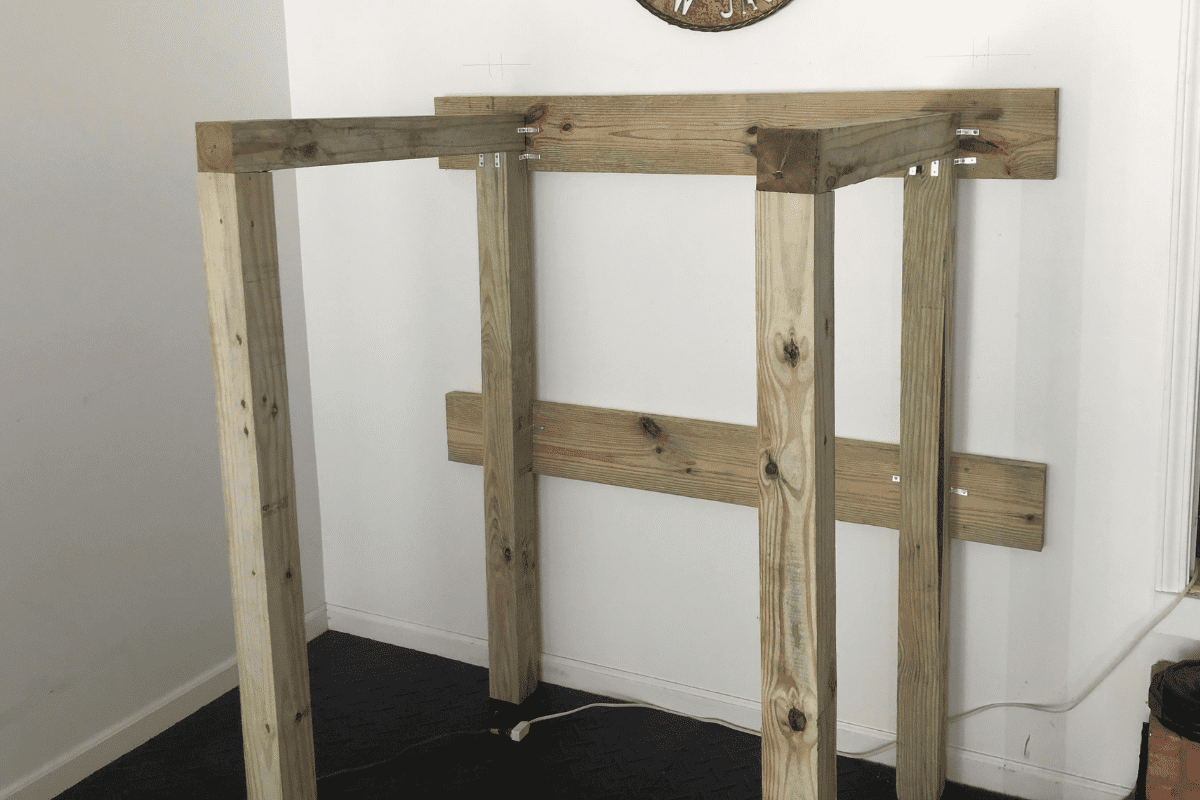
10 months ago I built a DIY Wooden Squat Rack made primarily out of 4x4s. I’ve been using this homemade squat rack to squat with two or three times a week since it was built. The good news is it’s still standing and it’s still working.
Not bad considering prior to this squat rack the most impressive thing I’d ever built was a table we got from IKEA.
Hindsight being 20/20 I did make a few mistakes when I built my DIY squat rack.
If I had it to do over again there are 3 things that I would definitely do differently. In this article I’m going to discuss each of the mistakes that I made so, hopefully, you can avoid them if you decide to build your own squat rack.
By the way, if you want to get caught up to speed on the wooden squat rack I built, check out my $60 DIY Squat Rack Build.
Disclaimer: This information is for entertainment purposes only. Horton Barbell is not responsible for any damage caused to you or your property by building your own DIY squat rack.
Rather watch then read? Here’s my video –
Mistake #1 – Make Level Cuts
This is by far the worst of the 3 mistakes. It’s also the mistake that will most likely lead me to eventually retire my simple squat rack and purchase a steel rack at some point.
The first thing you need to understand is that I made all my cuts using a $10 hand saw. If you have a circular saw, or even better, a table saw then you’re not likely to run into this problem.
(Or, pro tip, just get all your boards cut at Lowe’s or Home Depot and you don’t have to worry about making your own cuts at all)
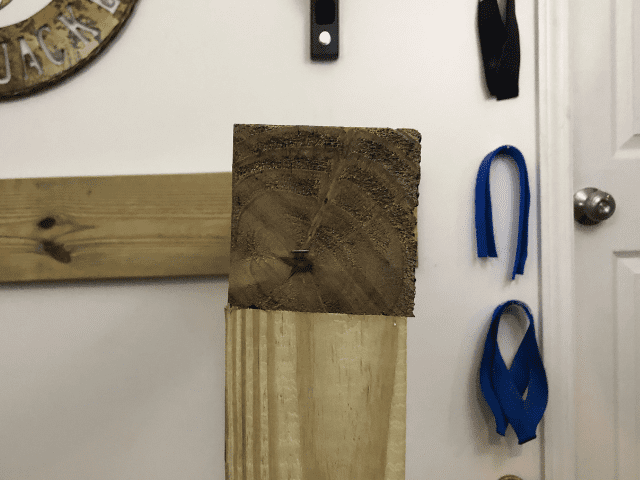
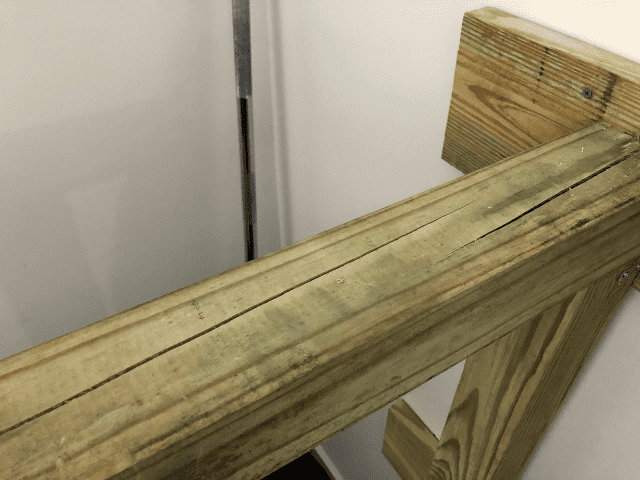
The issue that I ended up with is that a few of my cuts were not perfectly level. This caused a couple of my junctions to not be perfectly flush.
But, because of the weight and force of a barbell pressing down upon the horizontal beam, it eventually twisted slightly to conform with the vertical beam. It eventually cracked the wood on the cross pieces. It’s a hairline crack that I’ve been paying close attention to for obvious reasons.
I strongly believe it’s not bad enough to be an issue. If I thought it was, obviously I’d stop using the rack immediately.
But if I had it to do over again I would have remeasured and recut where needed to get perfectly level ends. That way when I laid the horizontal beams on top of the vertical beams they would have been perfectly flush.
Mistake #2 – Don’t Be So Cheap
Look, I get it. One of the main reasons why we decide to build things ourselves versus buy them is because we want to save money. Keep in mind though, especially with something like a DIY squat rack, it needs to be SAFE. So don’t skimp on the materials that you use.
This leads me to my second mistake. Maybe not so much a mistake (at least not yet) as opposed to something I would definitely do differently if I were to build my rack from scratch again.
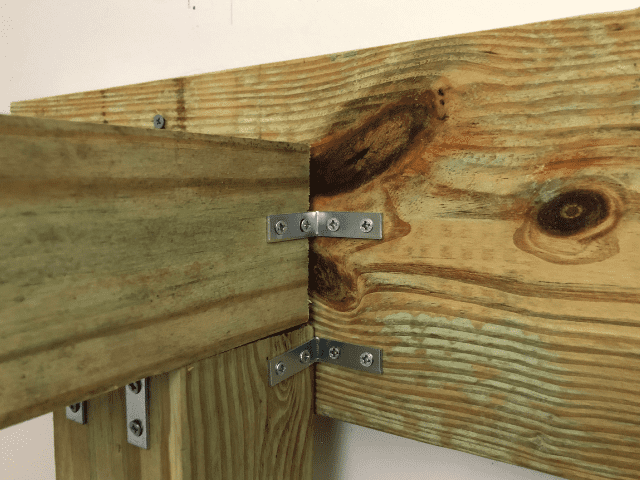
I bought a 20 pack of 1-1/2 inch Zinc Plated Corner Braces to secure my 4x4s in place. The 20-pack cost me just under $10.
I used them to secure the two back vertical beams to the wall. I also used them to secure my horizontal beam and front vertical beams together. Basically, my entire rack is held together with these braces.
Have they worked great? Yep. Have I had any issues with them? Nope.
I doubled them up to make most of my connections on each wood piece and they’ve done the job with no problems.
However, I would feel a bit better if all my beams were held together with slightly bigger and stronger braces. It would be an extra $10 investment that I would make if I were building my squat rack over.
Mistake #3 – Make It Smaller

Like Mistake #2, this is more so a “would do it different” than an outright mistake. After all, my DIY squat rack is still standing and functioning after almost a year now.
This mistake has to do with the dimensions that I used to build the rack itself.
I wanted to make sure I gave myself enough space inside of my rack. I didn’t want to have to worry about the bar rolling out of the rack or plates banging against the wall as I racked the bar after a set of squats.
With this idea in mind, I made my horizontal beam 3 feet long. At this size, I thought that gave me the room I would need and (at least at the time) give me enough room to still get my car into the garage if I needed to.
It turns out 3 feet was way more space than I actually needed.
So, how long would I make the horizontal beam if I had it to do over again?
I would at minimum shave 6 inches off and make the beam 30 inches. But, I actually would probably go even shorter. All I use my rack for is to squat, jerk and shoulder press. Ideally, I think 2 feet is all the space I really need.
Other “Drawbacks” With My DIY Squat Rack
A few other things that I want to mention regarding my DIY Squat Rack in case anyone else is going to try to build a rack of their own.
These aren’t mistakes per se, just limitations that my rack has that I knew going into the build, but didn’t concern me because it wasn’t features I needed.
This rack is more of a squat stand than it is some type of wooden power rack. There are no spotter arms or safety bars which I’m okay with because I’m comfortable bailing out of a squat if I need to. If you’re not, it’s something I would definitely consider.
It doesn’t have a pull-up bar the way a power rack generally would.
It doesn’t adjust in height and there are no j cups that you can slide down to set up for bench.
Again, these are all things I didn’t want or need out of my squat rack. My rack gives me exactly the functionality I was wanting. But, take all that into consideration if those are things that you want for the squat rack in your home gym.
Final Thoughts
Making your own DIY squat rack is a great way to build something that is customized for your needs while saving some money at the same time.
Make sure though, and I can’t emphasize this enough, that if you are going to build your own squat rack you make 100% sure that it is safe to use. You can get seriously injured if your rack fails while trying to rack weight from a back squat.
If you’re not completely sure that what you’re going to build will be safe then go ahead and just buy a rack.